📋 Chapter 5: Complete the Adoption Experience with a Form
| Project Goal | Build a form to accept dummy 'checkout' data |
|---|---|
| What you’ll learn | How to create and validate forms in a Vue application |
| Tools you’ll need | A modern browser like Chrome. An account in CodeSandbox.io. If you get lost, import the starting point for this chapter here. Instructions on how to do this are in Appendix 1 |
| Time needed to complete | 1 hour |
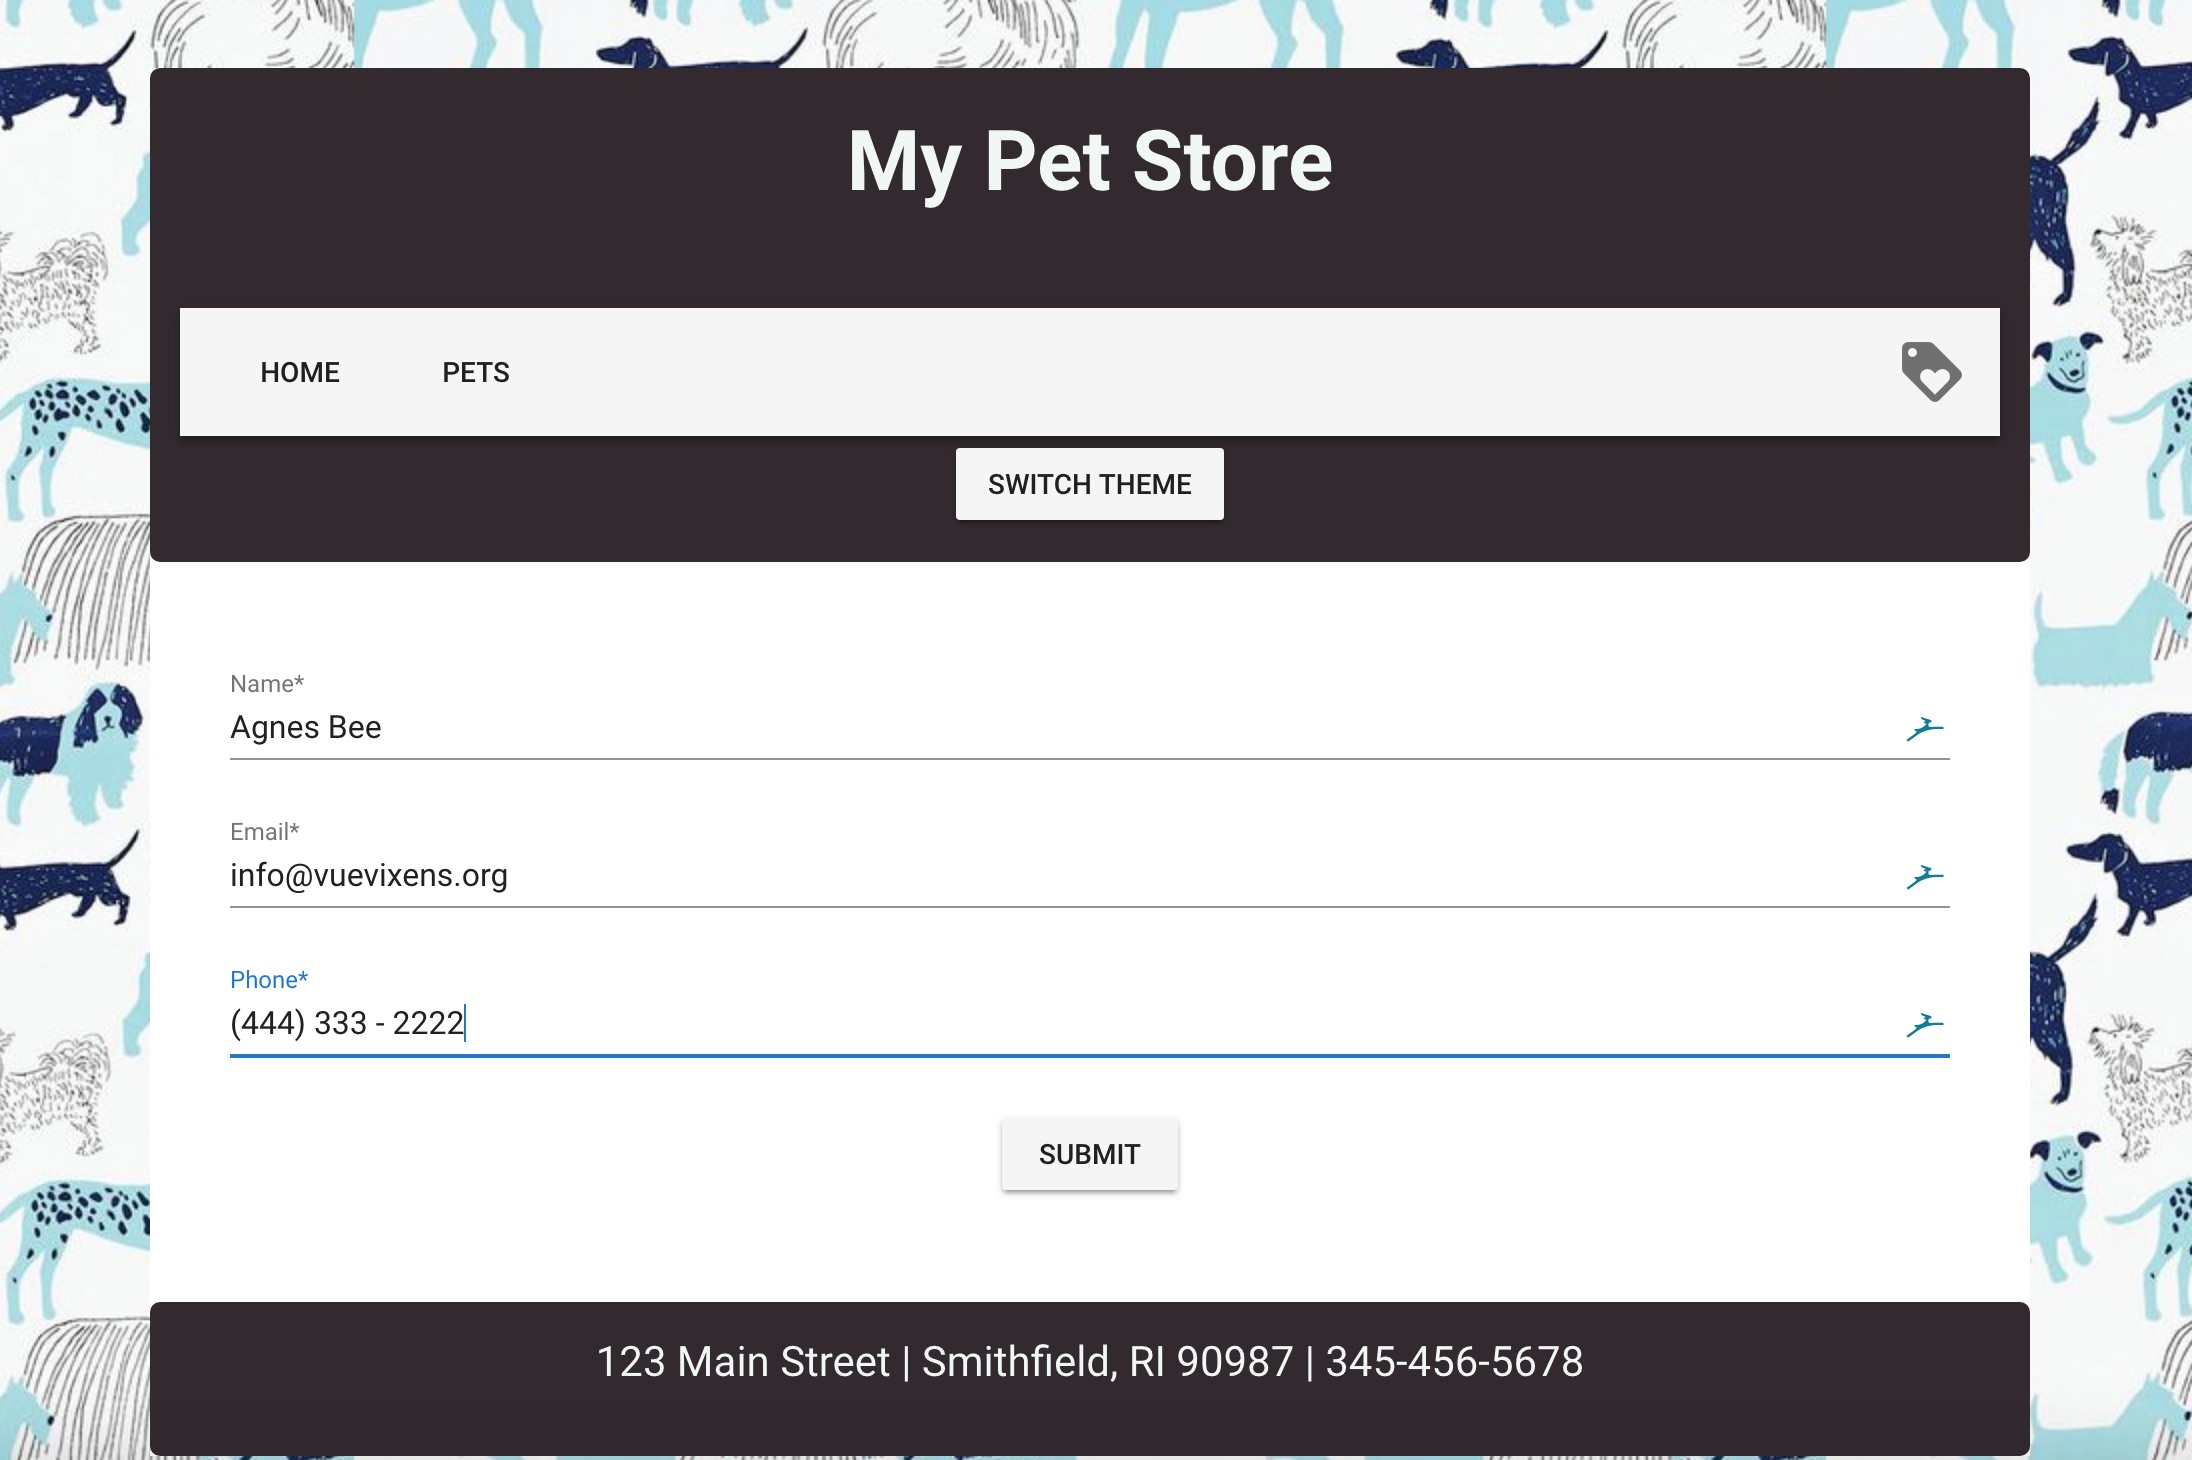
What You'll Build

Instructions
If you need to restart your project, clone this repo into Code Sandbox by clicking on the Import from GitHub link on the bottom left of the main page, and then pasting the repo's url into the fields. You can also continue with the project you've created in chapter 4.
In this chapter, we will create a form to fill after you finish selecting dogs. First of all, we should create a new component to contain this form and add a form route to our router settings.
Scaffold the Form Component
Go to the views folder and create a new file called Form.vue.
Inside this file place a <template></template> tag and create a div inside it. Add text This form works! inside this div. Now our component should look like this:
<template>
	<div>
		This form works!
	</div>
</template>
2
3
4
5
Now let's create a route for this component. Go to main.js and import the Form component:
import Form from './views/Form';
Add one more option to the routes array:
{ path: "/form", component: Form }
Let's check how our form works. Go to the /form route by appending /form to the shop's url. You should see the text 'This form works!' between our header and footer.
Let's add a class to our div and create a styling for it.
<div class="form-wrapper">
	This form works!
</div>
2
3
Add a <style scoped></style> tag below the template. Inside this tag we will add some stylings for our form and the first one will be form-wrapper padding:
<style scoped>
  .form-wrapper {
    padding: 40px;
  }
</style>
2
3
4
5
Build the Form
Now it's time to build our actual form. We will use a Vuetify component called v-form to make it look nice.
💡
To learn more about Vuetify-styled forms, check its docs.
As a first step we will add an empty v-form inside our form-wrapper
<template>
	<div class="form-wrapper">
		<v-form> </v-form>
	</div>
</template>
2
3
4
5
Of course, nothing is displayed right now, because we have to add some form fields.
For the form inputs Vuetify uses the component called v-text-field. It has an attribute label where we can set a label for a certain field. Let's create three fields with labels "Name", "Email" and "Phone" inside the <template>.
<div class="form-wrapper">
	<v-form>
		<v-text-field label="Name"></v-text-field>
		<v-text-field label="Email"></v-text-field>
		<v-text-field label="Phone"></v-text-field>
	</v-form>
</div>
2
3
4
5
6
7
It's already looking better!
Add a Submit Button
Of course we need to submit our form somehow. Let's add a submit button below the form fields
<div class="form-wrapper">
	<v-form>
		<v-text-field label="Name"></v-text-field>
		<v-text-field label="Email"></v-text-field>
		<v-text-field label="Phone"></v-text-field>
		<v-btn>Submit</v-btn>
	</v-form>
</div>
2
3
4
5
6
7
8
Our button is aligned to the left side, so let's also add a text-align: center to form-wrapper styles
.form-wrapper {
	padding: 40px;
	text-align: center;
}
2
3
4
For now, the Submit button doesn't do anything. We will add a method which will take all the form fields' values and print them to the console. To achieve this we have to create a property for each field in the component data and bind these properties to corresponding fields with a v-model directive.
💡
The v-model directive creates two-way data bindings on form input and textarea elements. It automatically picks the correct way to update the element based on the input type.
Bind Some Data
💡
What does two-way binding mean? It means that we can change binded data either from the input field or inside the component's data (and both binded data will be changed as a result).
Let's add a <script></script> block above the styles, add export default statement into it and create component data (remember, data should be a function returning an object:
<script>
  export default {
    data() {
      return {

      }
    }
  }
</script>
2
3
4
5
6
7
8
9
Now let's add three new properties to this newly created object:
data() {
  return {
    name: "",
    email: "",
    phone: ""
  };
}
2
3
4
5
6
7
As you can see, all of them are empty strings.
Bind these properties to corresponding form inputs in the template by adding v-model to the v-form's input fields:
<v-form>
	<v-text-field label="Name" v-model="name"></v-text-field>
	<v-text-field label="Email" v-model="email"></v-text-field>
	<v-text-field label="Phone" v-model="phone"></v-text-field>
	<v-btn>Submit</v-btn>
</v-form>
2
3
4
5
6
Now try to change the value of the name property in the data object to your own name, rather than an empty string. Observe how the input has changed! When you're typing something in the input field, the corresponding data property will be changed too. That's how two-way data binding works.
Now we can print our form values to console on submission. Let's create a method for this (we will add methods right after data (don't forget to add a comma after closing data:
methods: {
  submit() {
    console.log(
      "Name:",
      this.name,
      "Email:",
      this.email,
      "Phone:",
      this.phone
    );
  }
}
2
3
4
5
6
7
8
9
10
11
12
and bind it to Submit button click:
<v-btn @click="submit">Submit</v-btn>
Try to fill the form with some test data and click Submit. You can see the form data in your Code Sandbox console.
Display Submitted Data
Console logs are great but that's definitely not the thing you want to see in your final application version. Instead of printing values to console, let's show them on the screen once the form is submitted. Of course, first we need some kind of an indicator to check if the form is already submitted or not.
Let's create a new property in data called submitted and set it to false (because when our component is created the form is not yet submitted):
data() {
  return {
    name: "",
    email: "",
    phone: "",
    submitted: false
  };
},
2
3
4
5
6
7
8
Now we need to switch submitted to true on submit event. Let's add this logic to our submit method instead of console.log:
methods: {
  submit() {
    this.submitted = true;
  }
}
2
3
4
5
Finally, we have to create a div which will replace our form. Add this code above the <v-form> tag:
<div class="text-xs-center">
	<h2>Thank you for you interest, we will contact you soon</h2>
	<div class="details text-xs-left">
		<h3 class="blue-grey--text">Customer details</h3>
		<p><strong>Name:</strong> {{name}}</p>
		<p><strong>Email:</strong> {{email}}</p>
		<p><strong>Phone:</strong> {{phone}}</p>
	</div>
	<v-btn to="/">Go to homepage</v-btn>
</div>
2
3
4
5
6
7
8
9
10
and add some styles to our <style>:
.details {
	padding-top: 30px;
}
h3 {
	padding-bottom: 20px;
}
2
3
4
5
6
Display Data Conditionally
Now we can see both the div with our form data and the form itself. That looks pretty strange.
Let's display them conditionally. We will show the div with data when submitted is true; otherwise we will display the form.
So we're going to add v-if="submitted" to the wrapper div of the form data and v-else to the v-form itself:
<div class="text-xs-center" v-if="submitted">
	...
</div>
<v-form v-else>
	...
</v-form>
2
3
4
5
6
Now the form hides after sumbission and we can see the submitted user data.
Add Validation
The form still need proper validation, but it's working! Let's add a button to the Favorites component leading to the form after we have selected the dogs. Go to Favorites.vue and add the following code right after the </v-list-item> closing tag.
<v-btn to="/form">Adopt</v-btn>
Great! Now we can easily navigate to our form but it still needs some kind of a validation. Right now we can fill the email field with any string and we can send letters as a phone number. Also, we can submit even an empty form!
To change the form validity we have to create a new data property called valid and bind it to the form via v-model. In Form.vue edit the data object:
data() {
  return {
    name: "",
    email: "",
    phone: "",
    submitted: false,
    valid: true
  };
},
2
3
4
5
6
7
8
9
Edit the form to bind the valid property:
<v-form v-else v-model="valid"></v-form>
Let's also disable our Submit button when form is not valid, adding variable nameRules , we will include more information for this variable in next steps.
<v-btn @click="submit" :disabled="!nameRules">Submit</v-btn>
Now we can start to create our validation rules.
💡
All input components in the v-form have a rules prop which takes an array of functions. Whenever the value of an input is changed, each function in the array will receive the new value. If a function returns false or a string, validation has failed. Vuetify will use these results to set the v-model to true or false. So by having v-model="valid" on our v-form, we will know in our data if the form is valid. We use this information to disable the submit button. Currently our submit button will never be disabled as we have no validation rules, thus our form is always valid.
Validation 1: Name
First we will try to deny empty values for the name field. Let's create a nameRules property in our data:
data() {
  return {
    name: "",
    email: "",
    phone: "",
    submitted: false,
    valid: true,
    nameRules: []
  };
},
2
3
4
5
6
7
8
9
10
Now add the first rule. Remember, validation rules are functions which receive the value of the field and return a boolean value; true will mean this field has valid value and false means it doesn't. So, our first rule will be:
nameRules: [(name) => !!name];
What is happening here? !name will return true if the name is empty and false if it has non-empty value. Then we perform the second negation, reverting value one more time. The double negation is a pretty common method to check if string is non-empty.
Add nameRules to the rules prop of the name field and make this field required:
<v-text-field label="Name" required :rules="nameRules" v-model="name"></v-text-field>
Now try to select the Name field and then select other one. You can see the red color and the text false below the field (and the Submit button is disabled as well).
Error text can be provided via the || operator in the rule. So the value of this error is false OR <error message>. Let's provide a more meaningful error for the name field:
nameRules: [(name) => !!name || 'Name is required'];
Now the error message looks better!
Let's add one more rule: a name cannot be shorter than 2 letters:
nameRules: [
	(name) => !!name || 'Name is required',
	(name) => name.length > 2 || 'Name must be longer than 2 characters',
];
2
3
4
Try to fill the name field with 1 character and check the error.
Validation 2: Email
Now we're switching to the email field. First we will create an emailRules property in data and add the non-empty check similar to the non-empty name rule:
emailRules: [(email) => !!email || 'Email is required'];
Don't forget to add required and the rules property to the email field:
<v-text-field label="Email" required :rules="emailRules" v-model="email"></v-text-field>
The second rule for email will be a little tricky. We will check if email matched a certain pattern called regular expression or RegEx
💡
Regular expressions are patterns used to match character combinations in strings. In JavaScript, regular expressions are also objects.
For a deep dive into RegEx, you can read this MDN Article to check the list of special characters used in regular expressions.
For now, simply copy the regex from the code below:
emailRules: [
	(email) => !!email || 'Email is required',
	(email) => /^\w+([.-]?\w+)*@\w+([.-]?\w+)*(\.\w{2,3})+$/.test(email) || 'Email must be valid',
];
2
3
4
Now try to enter any random characters to the email field. You can see this new error because now this field demands a @ character, a dot and at least 2 characters after the dot. If you try to fill in your own email, you will see that the error disappears.
Validation 3: Phone
Now switch to the phone field. Let's create a set of rules very similar to the name ones. For the phone number, the length of the value should be more or equal to 7 characters:
phoneRules: [
	(phone) => !!phone || 'Phone is required',
	(phone) => phone.length >= 7 || 'Phone number should be at least 7 digits',
];
2
3
4
But as you can guess, you can still enter letters and the phone number is not formatted at all. To fix this, we have to add vue-the-mask. First, scroll down in the Explorer tab and open the Dependencies dropdown. Click on Add dependency button and seach for vue-the-mask. Install the dependency. vue-the-mask will be added to your package.json. We now have installed vue-the-mask but we need to add it to our component as a directive.
First, import vue-the-mask as such in your Form.vue:
import { mask } from 'vue-the-mask';
After that, add the following just before data in your <script> block:
directives: {
  mask,
},
2
3
💡
By adding the directives object to our component with one element mask, we are in fact registering mask to our component. This means that we can now add v-mask to any element in our component. Note that Vue prepends all directives with v-. Thus the directive mask becomes v-mask. More information can be found here.
Since v-mask is now a directive, we can add the following to our the v-text-field for our phone:
v-mask="'(###) ### - ####'"
By using '(###) ### - ####' as the input for our mask, we limit the input of our component to digits in that specific format. This means that a phone number such as (555) 555-1234 will be possible but we are unable to input it into another format or use non-digit characters. If your country uses a different format for phone numbers, go ahead and change the input to v-mask.
<v-text-field label="Phone" required :rules="phoneRules" v-mask="'(###) ### - ####'" v-model="phone"></v-text-field>
Clear the Favorites List On Submit
The last thing we want to achieve is to clear our favorites list on submitting the form. Go to the store/store.js and create a mutation for this by adding this code to the mutations object:
clearFavorites(state) {
  state.favorites = [];
}
2
3
Add an action to commit this mutation (and add it to actions):
clearFavorites({ commit }) {
  commit("clearFavorites");
}
2
3
Swich back to the Form.vue and let's dispatch this new action in submit method:
submit() {
  this.$store.dispatch("clearFavorites");
  this.submitted = true;
}
2
3
4
Now the favorites list is clearing right after the form is submitted.
🎊Congratulations, you've finished the web project!🎊
Final result