📋 Chapter 3: Connect your Project to an API
| Project Goal | Learn how API calls work and how to implement them in your web app |
|---|---|
| What you’ll learn | Using the DogCEO API you will load dog images dynamically, instead of using dummy data |
| Tools you’ll need | A modern browser like Chrome. An account in CodeSandbox.io. If you get lost, import the starting point for this chapter here. Instructions on how to do this are in Appendix 1 |
| Time needed to complete | 1 hour |
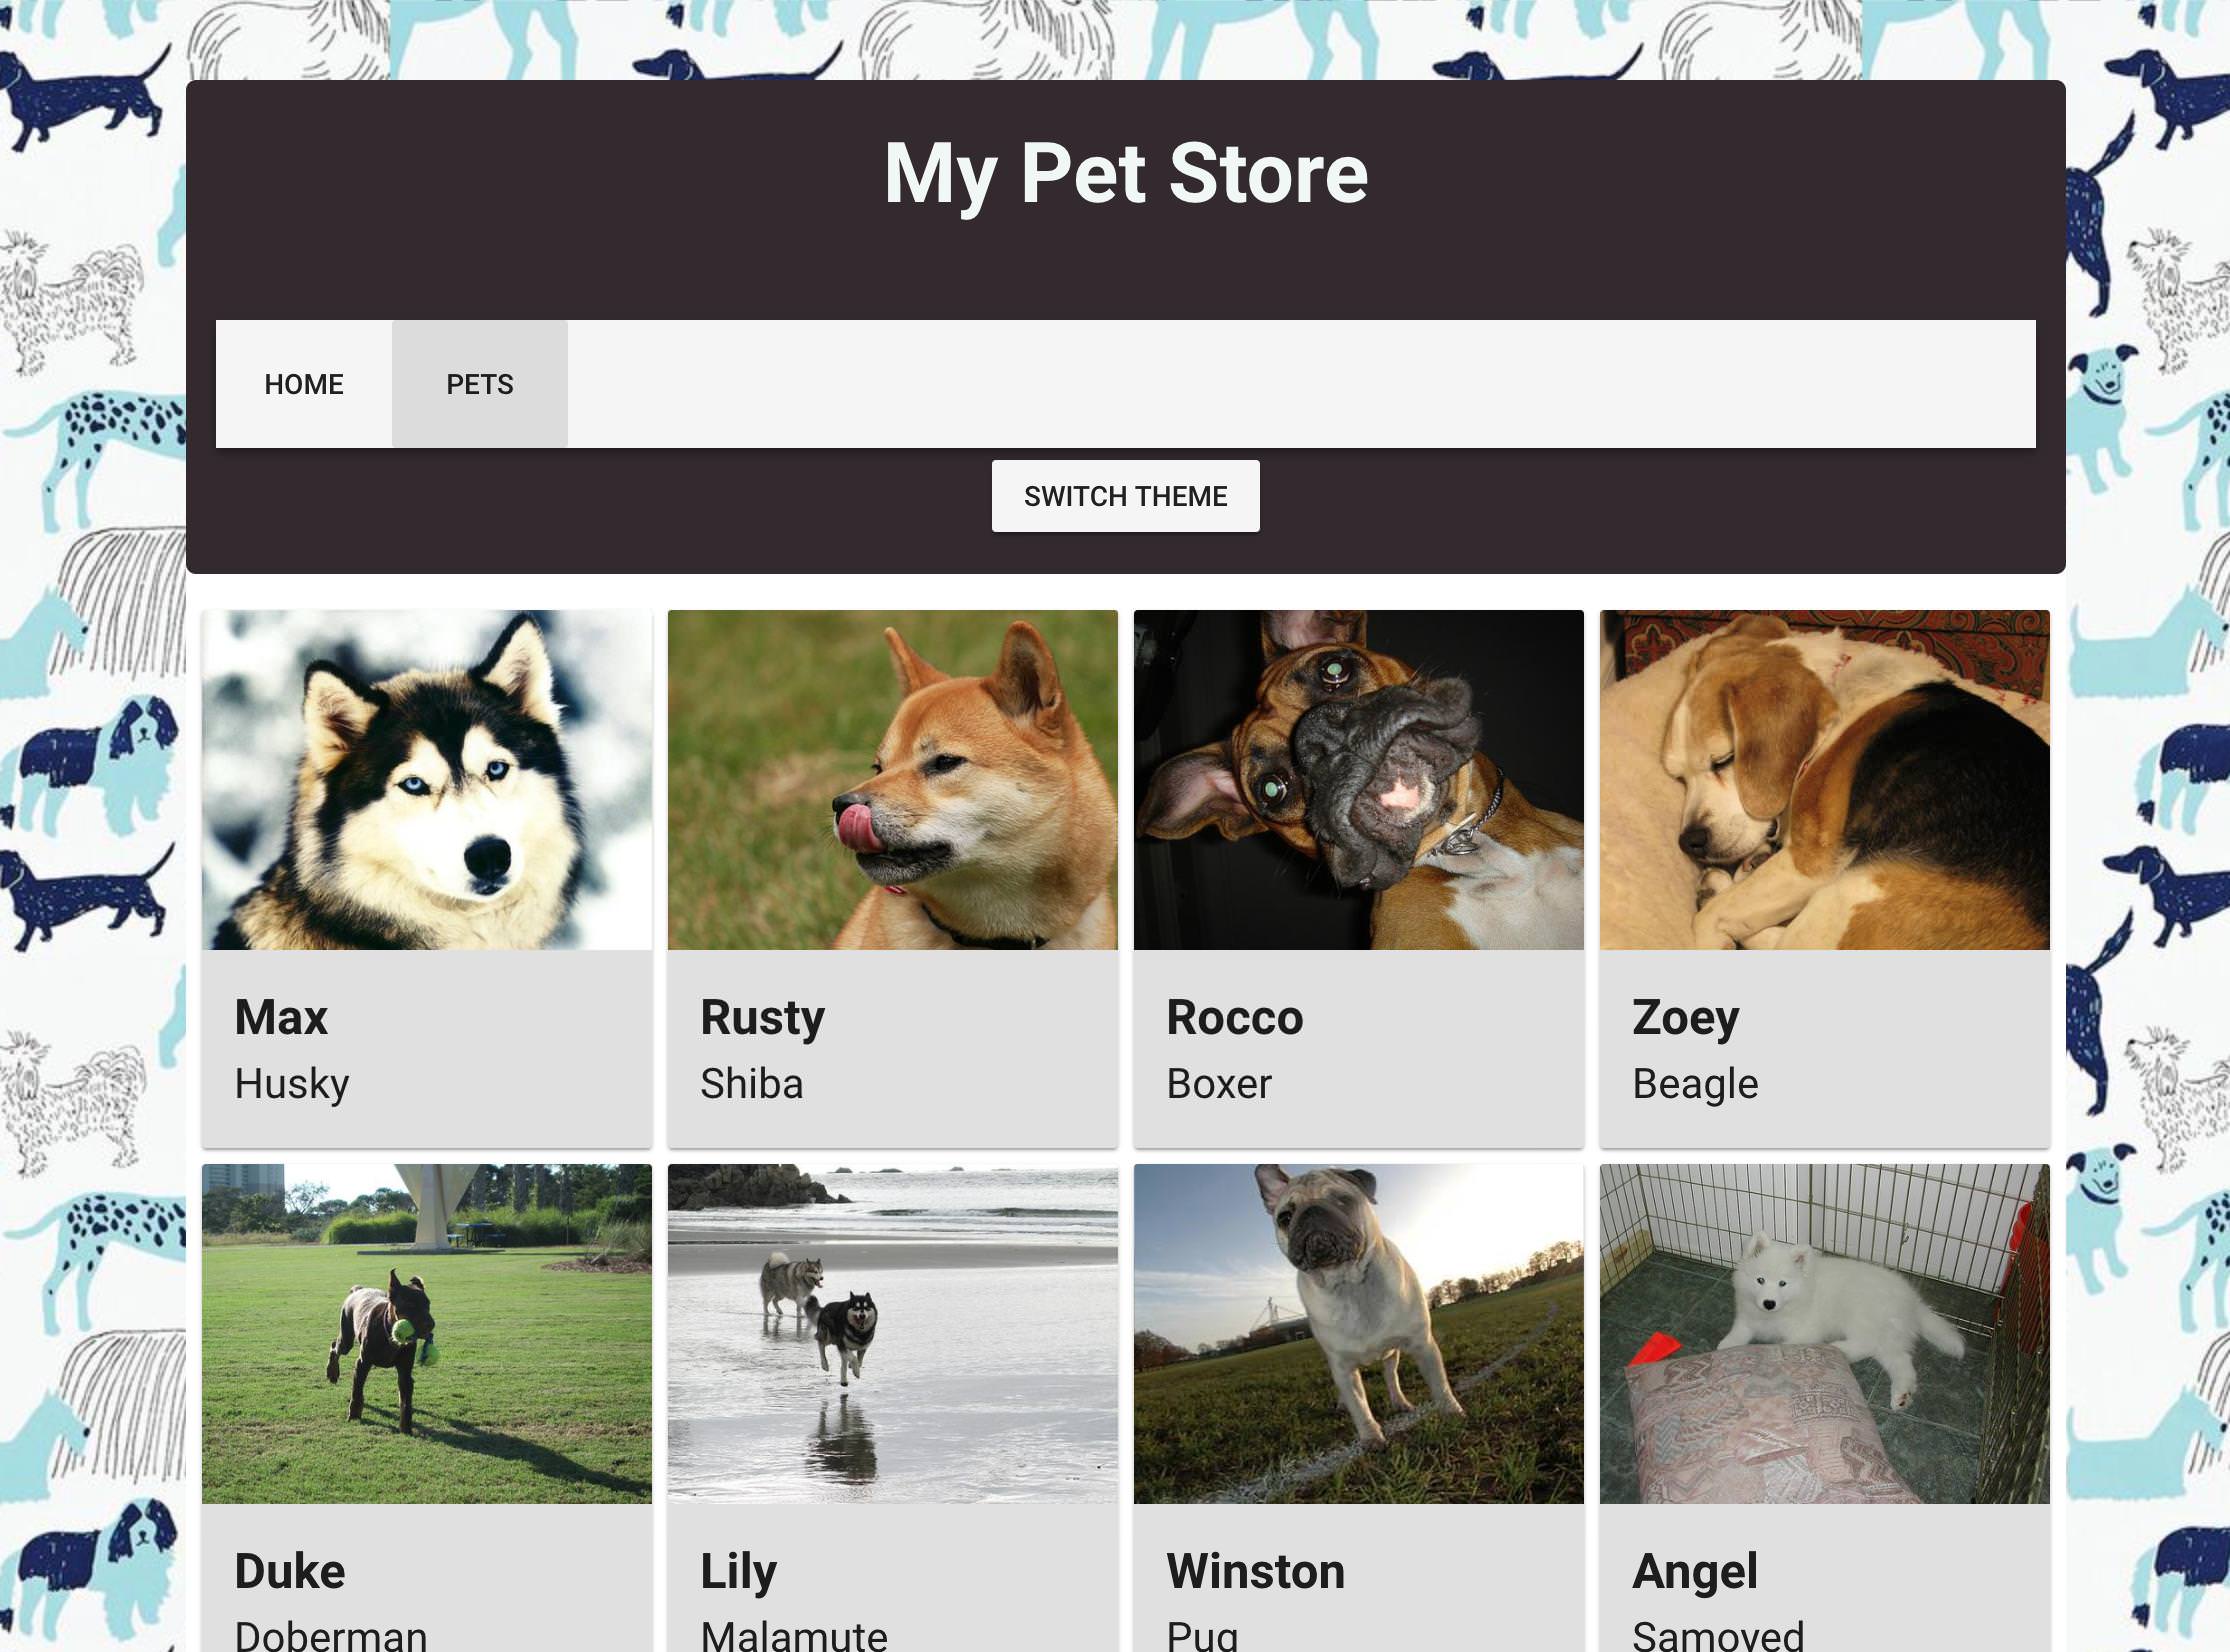
What You'll Build

Instructions
If you need to restart your project, clone this repo into Code Sandbox by clicking on the Import from GitHub link on the bottom left of the main page, and then pasting the repo's url into the fields. You can also continue with the project you've created in chapter 2.
So far, we have placed images of dogs onto our screens via some static JSON data that we imported into a component. That's great for demo purposes, but in real life, you're almost always going to build web apps that consume real data that's coming from either your own data sources, or externally, from somewhere on the internet. Let's learn how to consume third-party data.
To perform API calls we will need a library called axios. It's a promise-based HTTP client that works both in the browser and in a node.js environment.
💡
Originally, Vue supported its own way of making API calls using .ajax; but this resource was deprecated as Axios's standalone library worked very well for this purpose, removing the need for an integrated solution. Read more about this decision here.
Add Axios
First, add Axios's library to your project dependencies. To do so in Code Sandbox, click on Explorer tab -> Dependencies -> Add Dependency and search for axios. You will see that it is added into your package.json.
Import axios into the component where we will perform our API call - views/Pets.vue. In that component's script block (right after <script>), add this line:
import axios from 'axios';
All our calls will use the same base URL with different endpoints. Right under the imports for axios and possible others, add the base URL to Axios' options in views/Pets.vue:
axios.defaults.baseURL = 'https://dog.ceo/api';
With this line we have configured axios to always start API calls to the URL https://dog.ceo/api. Now we are ready to make our first API call.
Call the API
Let's replace the first static image with the random Husky picture from the Dog CEO API. First we have to check which endpoint we have to use. Looking at the API's documentation we can find out that we need to append /breed/husky/images/random to the base API call (the api part is already in our base URL as we have configured that in the assignment of axios.defaults.baseURL).
We want a new image to replace the old one right when the component is created, so let's add a created() hook after the data() property (in views/Pets.vue):
...
data() {...},
created() {},
...
2
3
4
💡
Note: Make sure to add a comma after the data object and then add the created() hook!
💡
This is our app's first lifecycle hook! These are very useful when you want fine control over when to run blocks of code. Read more here
Inside the created hook we will add our first query to the API. To perform a GET request Axios uses the axios.get method. The result will be a JavaScript promise, so we have to provide success and failure callbacks to it. For now, let's simply print the query result to the console. Inside created(){} place this highlighted Axios snippet (lines 2-9):
created() {
  axios
    .get("/breed/husky/images/random")
    .then(response => {
      console.log(response);
    })
    .catch(error => {
      console.log(error);
    });
  }
2
3
4
5
6
7
8
9
10
In the browser view in Code Sandbox, switch to the Pets tab. You should see an object in your console. Drill into it by clicking its left-hand arrow. We are interested in its data field. You can see we have a status success and a message with an image URL (you can copy/paste it to your browser and discover a cute Husky).
Use the API 1 - Replace Some of the Static Data
Let's replace our Husky image with this new one. First, we should find a Husky in our dogs array with an Array.find method. It will check the dogs array items that we are already loading into the component from the data/dogs.js data file one by one to find the first item matching provided criteria. In our case the criteria is a breed equal to husky. Replace the console.log() inside the then callback in the Axios call we just implemented with the highlighted lines (5-6):
created() {
  axios
    .get("/breed/husky/images/random")
    .then(response => {
      const husky = this.dogs.find(dog => dog.breed === 'husky');
      console.log(husky);
    })
    .catch(error => {
      console.log(error);
    });
  }
2
3
4
5
6
7
8
9
10
11
Ok, we have found a husky, which you can see in the console.log(). You can also see him in your app's Pets page - look for 'Max', listed as a husky. Now let's provide him with a new image by reassigning the image url from the static data to data coming from the API. Add the highlighted line (7) under the lines you just added above.
created() {
  axios
    .get("/breed/husky/images/random")
    .then(response => {
      const husky = this.dogs.find(dog => dog.breed === 'husky');
      console.log(husky);
      husky.img = response.data.message;
    })
    .catch(error => {
      console.log(error);
    });
  }
2
3
4
5
6
7
8
9
10
11
12
You should see the image change to a random husky image pulled from the Dog CEO API.
Use the API 2 - Randomize the Images
Let's try to load a random image for each dog in our dogs array. The first thing we need is a proper endpoint for each breed we have. Remember how we called to the endpoint /breed/husky/images/random for the breed husky? Let's create an array of links where each link is specific to a breed. We will create the array of links using the .map method.
💡
The map() method creates a new array with the results of calling a provided function on every element in the calling array.
To create an array of links, we create a linksArray constant and add it inside the created() hook, like this (lines 2-4):
created() {
  const linksArray = this.dogs.map(
        dog => "/breed/" + dog.breed + "/images/random"
      );
  axios
    .get("/breed/husky/images/random")
    .then(response => {
      const husky = this.dogs.find(dog => dog.breed === 'husky');
      console.log(husky);
      husky.img = response.data.message;
    })
    .catch(error => {
      console.log(error);
    });
  }
2
3
4
5
6
7
8
9
10
11
12
13
14
15
We're taking the breed of each dog in the array and inserting it inside the endpoint string (we used the same one previously for the husky, but breed was hard-coded to a static value there).
At this point, we have to perform multiple API calls using all the links we've just created in our linksArray constant - as many API calls exist in our static data. To help us do this, axios has helper functions called axios.all and axios.spread.
We will provide an array of our requests to the first one, axios.all; it will return an array of responses and we use axios.spread to spread this array into multiple arguments. To create an array of queries we will use a .map method on our linksArray, performing axios.get for each link. Add this snippet (lines 5-12) right under the linksArray snippet you added just before.
created() {
  const linksArray = this.dogs.map(
        dog => "/breed/" + dog.breed + "/images/random"
      );
  axios.all(linksArray.map(link => axios.get(link)))
   .then(
     axios.spread((...res) => {
       this.dogs.forEach((dog, index) => {
         dog.img = res[index].data.message;
       });
     })
   );
  }
2
3
4
5
6
7
8
9
10
11
12
13
💡
What's going on here? The forEach() method executes a provided function once for each array element in linksArray. It's basically looping through the static data and adding a random image to this.dogs. So, after we've got an array of images in response, we are iterating through our dogs array again, replacing each dog image with a corresponding new one from the API (index is the index of the current element being processed in the array; it is the same for both arrays because response objects are placed in the same order they were sent).
Now we have new images each time our Pets component is created (you can see the images change on page refresh or simply by switching the tabs from pets to home and back). The dogs' names and breeds are still being drawn from static data, but the images are coming from the API, matched with the static dog's breed.
The only remaining problem is that we can still see old images for a short moment when we enter the pets tab. Let's clear the dogs images before we perform a query. Add this code (lines 2-4) at the start of the created() hook (lines 2-4):
created() {
  this.dogs.forEach(dog => {
     dog.img = "";
  });
  const linksArray = this.dogs.map(
        dog => "/breed/" + dog.breed + "/images/random"
      );
  axios.all(linksArray.map(link => axios.get(link)))
   .then(
     axios.spread((...res) => {
       this.dogs.forEach((dog, index) => {
         dog.img = res[index].data.message;
       });
     })
   );
}
2
3
4
5
6
7
8
9
10
11
12
13
14
15
16
Now we initially see empty dog portraits and then images are loaded from the API. Progress!
Final result