🖥️ 1: Build A Simple Pet Fetching Web App
| Project Goal | Get started with Vue.js basics and simple API calls |
|---|---|
| What you’ll learn | Setting up your Vue app, components basics, performing simple REST API calls using Axios |
| Tools you’ll need | A modern browser like Chrome. A GitHub account which can be used to login to CodeSandbox. |
| Time needed to complete | 1 hour |
| Just want to try the app? | CodeSandbox link |
Instructions
Scaffold your app
We'll start from scratch in CodeSandbox. Create a CodeSandbox account and scaffold a starter Vue.js template by clicking here.
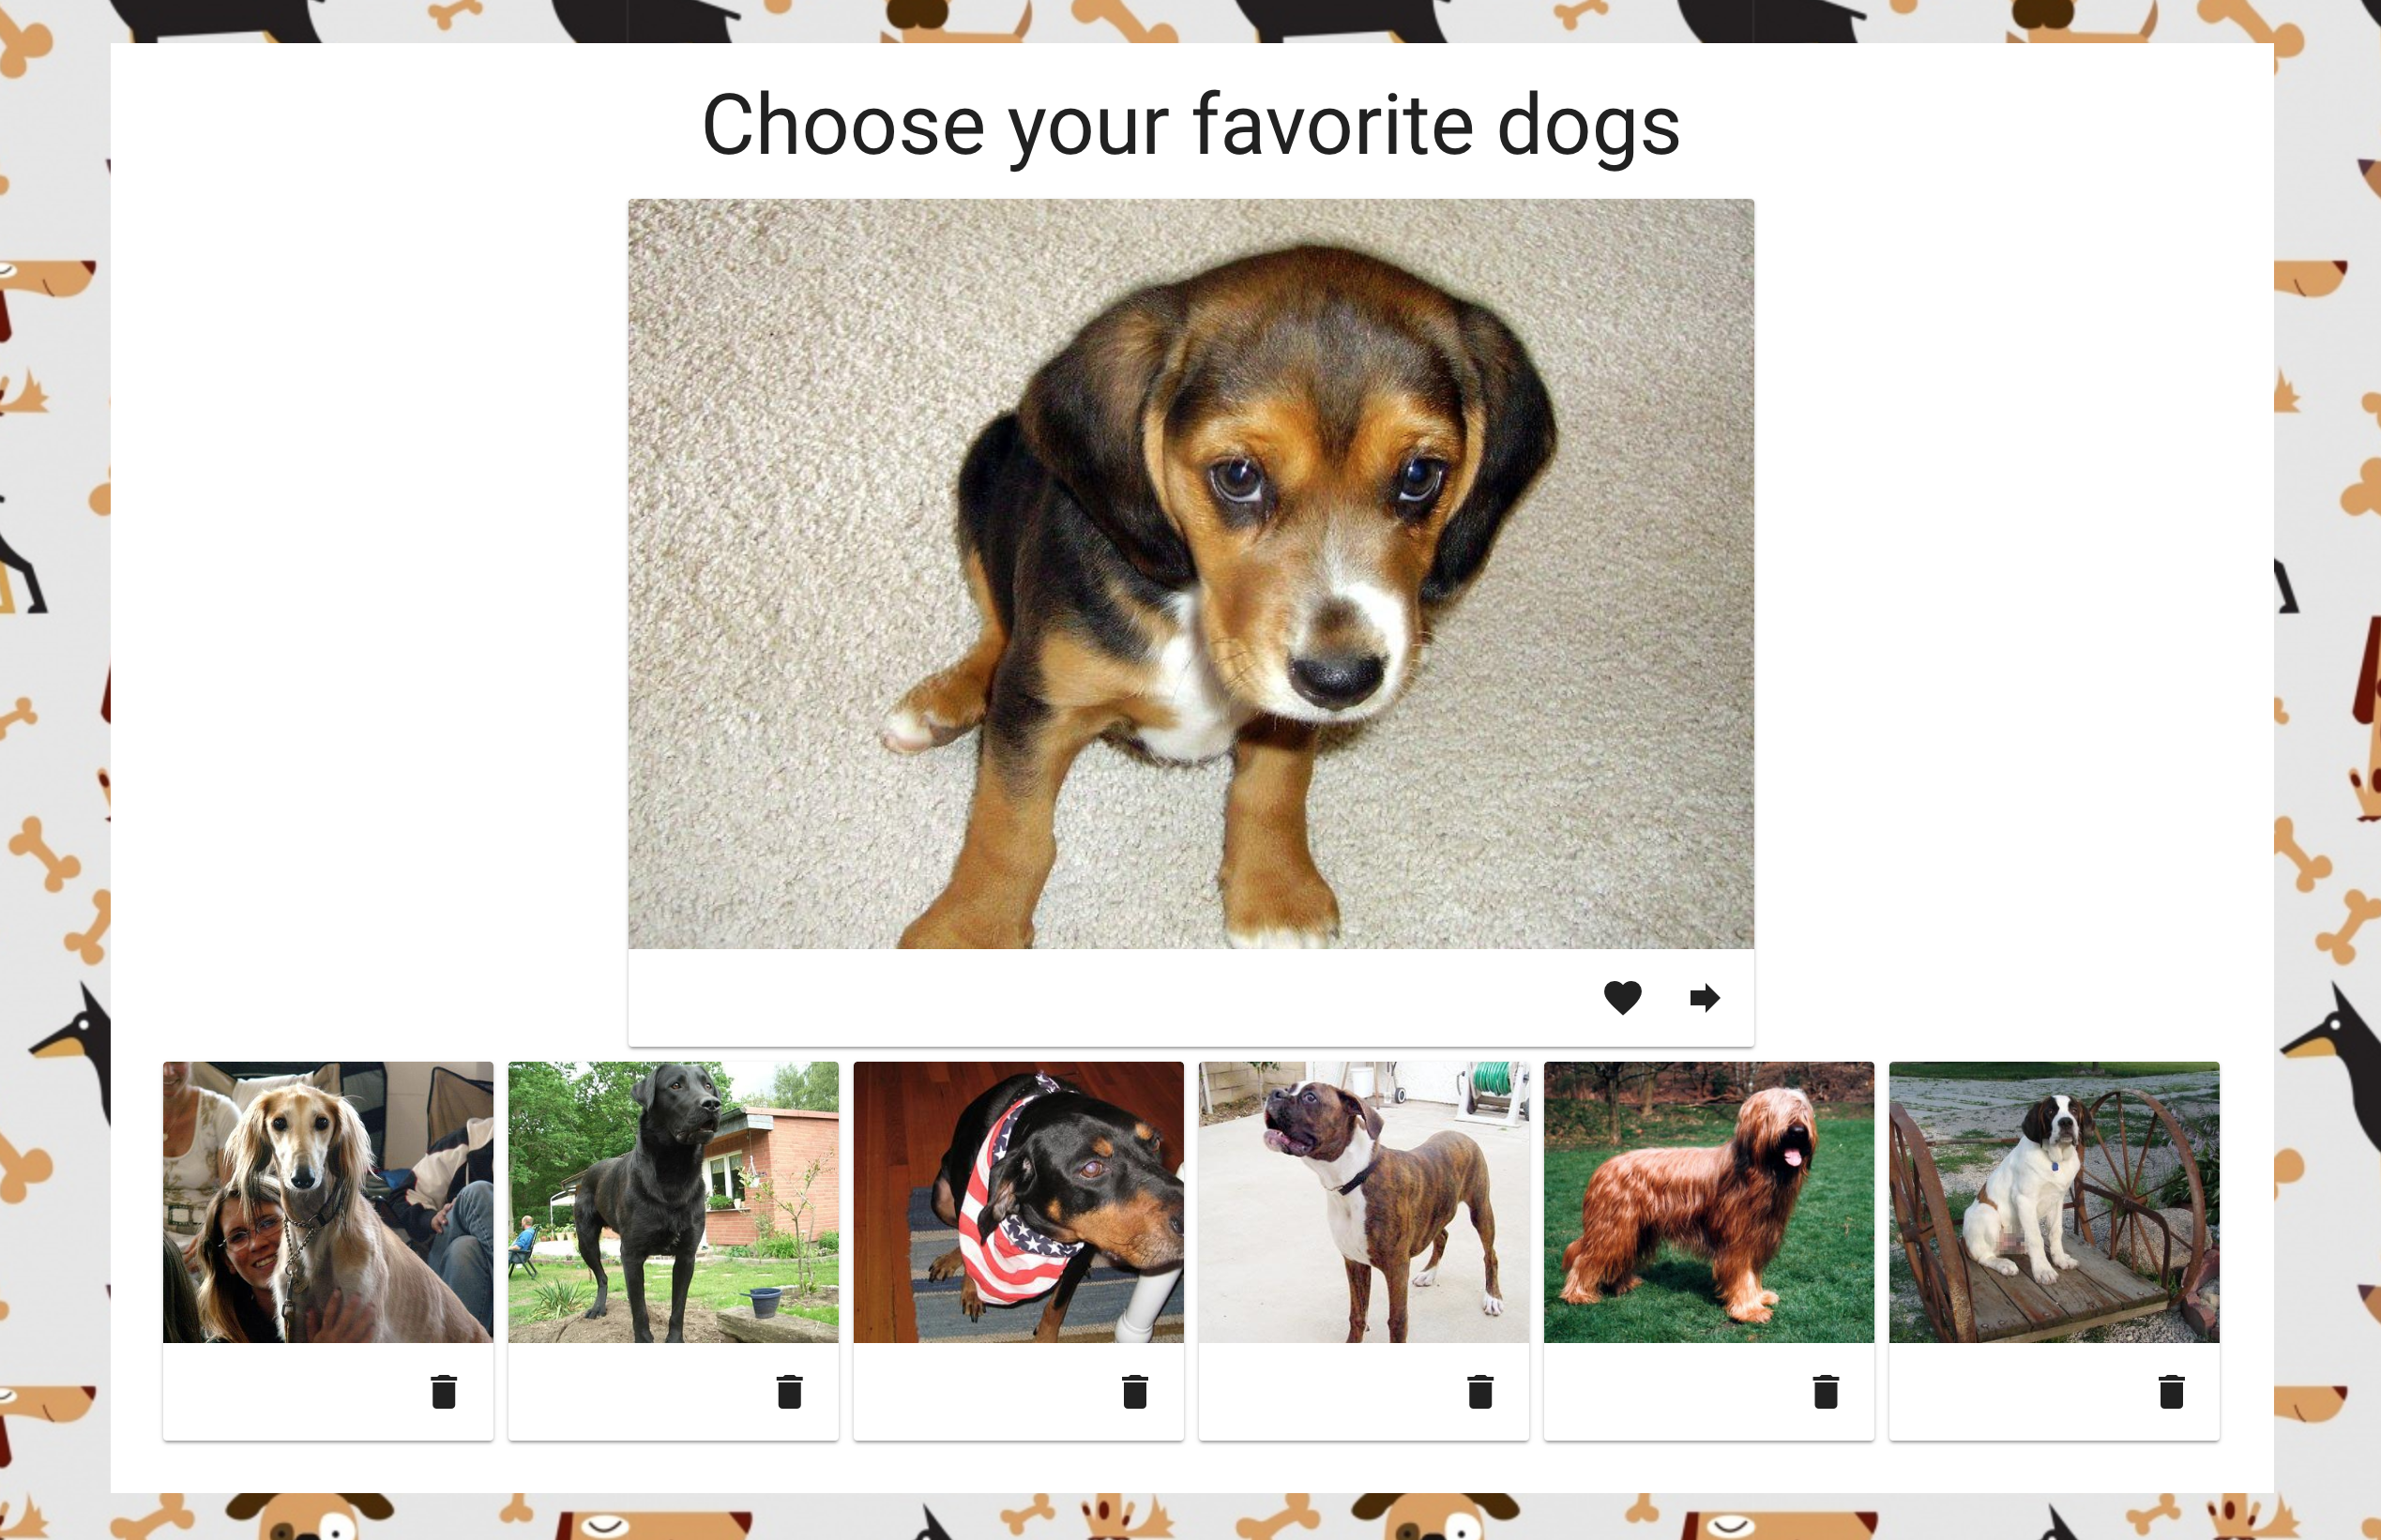
We're going to build an application to load random dog images and store them to a favorites list:
Take a look at the code that was scaffolded by CodeSandbox for a basic Vue.js app. The file main.js is open by default. This is the main starting point of a Vue.js app. Note that in this file you import Vue from its npm package: import Vue from "vue";. CodeSandbox imports all the needed dependencies from npm to build the app. You can always check out the root package.json to find out which dependencies are needed.
main.js also initializes the app as a new Vue.js app and sets the div into which the app code will be injected.
new Vue({
	render: (h) => h(App),
}).$mount('#app');
2
3
Open up App.vue. In this file, the 'home' component is built. It contains the three main parts of a Vue.js Single File Component (SFC): a template, a script block, and a style block.
Note the first div in the template block has the id of 'app' - this is the div where the app code will be injected. There's also a <HelloWorld> component included underneath the logo image. This is an example of an SFC being included into App.vue.
Open components/HelloWorld.vue and you'll find the source of the list of links that appears embedded in App.vue. This file also includes a script block with a msg variable and some more styles in a <style> block.
We're going to rip this sample app apart and recreate it! Let's get started.
Add the Styles
Let's start in App.vue, since we don't have to make any changes to main.js. Add the following style block at the bottom of the file, replacing the current <style> block:
<style>
img {
  max-width: 100%;
}

h1 {
  padding-bottom: 15px;
}

.dogs-layout {
  width: 100%;
  background: #fff center repeat;
  background-image: url("https://github.com/FrontEndFoxes/projects/blob/main/petshop/images/bg3.jpg?raw=true");
}

.dogs-overlay {
  width: 100%;
  padding: 20px;
  background-color: #fff;
  display: flex;
  flex-direction: column;
  align-items: center;
}

@media (max-width: 768px) {
  .dogs-overlay {
    margin: 0;
  }
}

.dog-card {
  width: 100%;
  max-width: 600px;
}
</style>
2
3
4
5
6
7
8
9
10
11
12
13
14
15
16
17
18
19
20
21
22
23
24
25
26
27
28
29
30
31
32
33
34
35
💡
Notice we don't use <scoped> as part of the style block. The 'scoped' keyword ensures that your styles will remain valid only for the current SFC, but we're going to make these styles universal.
This style block uses a path to an external image hosted on Github, rather than to a relative path. This is because CodeSandbox doesn't host images easily; normally you'd just add an image on a relative path such as /images/myImage.png.
Adding the stylesheet didn't do much to our template except break the existing styles. Let's fix the template!
☕️ Take a break! ☕️
Now's a great time to join a breakout room if you're joining us on Zoom!
Install Vuetify
Before we edit the template, we're going to install Vuetify. Vuetify is a cool library that gives a Material Design styling to your Vue apps.
💡
Vuetify is a semantic component framework for Vue. It aims to provide clean, semantic and reusable components for building your application. You can find full documentation for it here
Install it by clicking the 'Add Dependency' button in the Dependency dropdown area on the left in CodeSandbox. Search for 'Vuetify'.
Then click on the library in the list to install it.
Check whether the dependency is installed by opening package.json and checking the "dependencies" object. It should look like this:
"dependencies": {
    "vue": "^2.6.10",
    "vuetify": "^2.0.19"
},
2
3
4
Vuetify works via a plugin structure. In the /src folder of your project, create a new folder called plugins and inside that a new file called vuetify.js.
💡
In CodeSandbox, right click on the new folder to create a new file. Be careful to create these new assets in the /src folder!
In the new vuetify.js file, add this code to bootstrap the plugin:
import Vue from 'vue';
import Vuetify from 'vuetify';
import 'vuetify/dist/vuetify.min.css';
Vue.use(Vuetify);

export default new Vuetify();
2
3
4
5
6
Next, initialize Vuetify by opening main.js and adding these lines under the second import (line 3):
import vuetify from '@/plugins/vuetify';
Then, change the Vue initialization at the bottom of main.js to this:
new Vue({
	vuetify,
	render: (h) => h(App),
}).$mount('#app');
2
3
4
This ensures that Vuetify's themes and components will be available throughout the Vue app.
We are going to use icons in this app, so we also have to add Material icons into the head part of the index.html file. This file is in the public folder. Insert this line after the <title> tag:
<link href="https://fonts.googleapis.com/css?family=Roboto:100,300,400,500,700,900|Material+Icons" rel="stylesheet" />
Let's also change the page title to Dog Lover. To do so, we have to change the content of the title tag:
<title>Dog Lover</title>
Then, overwrite the current template in App.vue with this markup:
<template>
	<v-app>
		<v-main class="dogs-layout">
			<v-container fill-height>
				<div class="dogs-overlay">
					<h1 class="display-2 text-xs-center">Choose your favorite dogs</h1>
					<v-card class="dog-card">
						<v-img height="400px"></v-img>
						<v-card-actions>
							<v-spacer></v-spacer>
							<v-btn icon>
								<v-icon>favorite</v-icon>
							</v-btn>
							<v-btn icon>
								<v-icon>forward</v-icon>
							</v-btn>
						</v-card-actions>
					</v-card>
				</div>
			</v-container>
		</v-main>
	</v-app>
</template>
2
3
4
5
6
7
8
9
10
11
12
13
14
15
16
17
18
19
20
21
22
23
Your app should refresh (if it doesn't, use the manual refresh button in the app preview address bar). Wow, that made a big change!
💡
Note the use of <v-app> in this template markup - this is a requirement of Vuetify and is a sure sign you'll have a Vuetify-themed app. We're also using a bunch of Vuetify layout elements like v-container and UI components like v-card and v-btn.
Add some data
At this point, we need to start populating our UI with some data. First thing we want to do is to display a dog image inside our v-card. Let's add a static link just to test how it looks. In App.vue's template, change the src property of v-img:
<v-img height="400px" src="https://images.dog.ceo/breeds/chihuahua/n02085620_3407.jpg"></v-img>
How cute! 🐶
But the idea is to make this link dynamic, so it's time to create your first Vue variable. First, you have to add data() to your Vue component. This function should return an object of our Vue variables. Let's create one in the <script> block. Overwrite the current <script> block in App.vue:
<script>
export default {
  data() {
    return {
      currentDogLink: ""
    };
  }
};
</script>
2
3
4
5
6
7
8
9
💡
At this point you can remove the HelloWorld.vue file from the components folder as we won't need it. Right-click the file in CodeSandbox and click 'delete'.
Now you have a variable called currentDogLink and its default value is an empty string. We will use this variable to provide a link to a current dog in v-img. First, we will set the currentDogLink value by overwriting the data block we just added in App.vue:
data() {
  return {
    currentDogLink: "https://images.dog.ceo/breeds/chihuahua/n02085620_3407.jpg"
  };
}
2
3
4
5
Now we have to change the template to make the src property dynamic so it can use the value of the variable we just populated above. To do this we need a v-bind directive or its shortcut, :. Again in App.vue, edit the <v-img> tag to remove its hard-coded value:
<v-img height="400px" :src="currentDogLink"></v-img>
💡
The v-bind directive dynamically binds one or more attributes, or a component prop to an expression. That little : makes all the difference!
Great! Now it's time to load some dogs from an API!
☕️ Take a break! ☕️
Now's a great time to join a breakout room if you're joining us on Zoom!
Add Axios
To perform API calls we will need a library called Axios. It's a promise-based HTTP client that works both in the browser and in other node.js environments.
💡
Originally, Vue supported its own way of making API calls using .ajax; but this resource was deprecated as Axios's standalone library worked very well for this purpose, removing the need for an integrated solution. Read more about this decision here.
First, add Axios's library to your project dependencies. To do so in CodeSandbox, click on the Add Dependency button and search for axios. Install the latest version.
Import Axios into the component where we will perform our API call - App.vue. In that component's script block, add this line right under <script>:
import axios from 'axios';
At this point your script part of App.vue should look like this:
<script>
import axios from "axios";
export default {
  data() {
    return {
      currentDogLink:
        "https://images.dog.ceo/breeds/chihuahua/n02085620_3407.jpg"
    };
  }
};
</script>
2
3
4
5
6
7
8
9
10
11
Now we are ready to load an image from the API.
Call the API
Let's perform our first API call. To do so, we will create a loadNewDog method inside our component.
💡
The methods property is a list of functions that hang off of an object — typically the Vue instance itself or a Vue component.
Let's add it right after the data function:
data() {
  return {
    currentDogLink:
      "https://images.dog.ceo/breeds/chihuahua/n02085620_3407.jpg"
  };
},
methods: {
 loadNewDog() {}
}
2
3
4
5
6
7
8
9
For now this method does nothing but we want it to load a new dog from the API. First we have to check which endpoint we have to use. Looking at the API's documentation, we learn that we need to use https://dog.ceo/api/breeds/image/random as our endpoint. It will provide a random dog image.
To perform a GET request Axios uses the axios.get method. The result will be a JavaScript promise, so we have to provide success and failure callbacks to manage its lifecycle. For now, let's simply print the query result to console. Still in App.vue, edit the loadNewDog(){} method by placing this snippet between the curly brackets:
axios
	.get('https://dog.ceo/api/breeds/image/random')
	.then((response) => {
		console.log(response);
	})
	.catch((error) => {
		console.log(error);
	});
2
3
4
5
6
7
8
We want a new image to replace the old one right when the component is created, so let's add a created() hook right after methods:
created() {}
💡
Note: Make sure to add a comma after the methods object and then add the created() hook!
💡
This is our app's first lifecycle hook! These are very useful when you want fine control over when to run blocks of code. Read more here
Inside the created hook we will call our method.
created() {
  this.loadNewDog();
}
2
3
Now after clicking the refresh button in the browser window, you should see an object in your console. Drill into it by clicking its left-hand arrow. We are interested in its data field. You can see we have a status success and a message with an image URL.
☕️ Take a break! ☕️
Now's a great time to join a breakout room if you're joining us on Zoom!
Use the API
Let's replace our currentDogLink with the loaded one. At this point we can remove its static value:
data() {
  return {
    currentDogLink: ""
  };
},
2
3
4
5
Inside the loadNewDog method instead of printing result to the console we will assign response.data.message (which is actually the image URL) to the currentDogLink property:
loadNewDog() {
  axios
    .get("https://dog.ceo/api/breeds/image/random")
    .then(response => {
      this.currentDogLink = response.data.message;
    })
    .catch(error => {
      console.log(error);
    });
}
2
3
4
5
6
7
8
9
10
Now every time you refresh the page, you will have a shiny new dog image! 🎉
We also want to call the same method when the 'Next' arrow is clicked. Let's add a click handler to this button. We can use the v-on directive or its shortcut @. In the template, edit the "forward" icon v-btn:
<v-btn icon @click="loadNewDog">
	<v-icon>forward</v-icon>
</v-btn>
2
3
Now we can load new images simply by clicking on the 'Next' button.
Build the Favorites List
We want to let a user add dog images to a personal list of their favorites and show the gallery of these images right below our current dog view. To store the links we need one more data property - an array called favoriteDogs. Let's add it right after currentDogLink and make it empty by default:
data() {
  return {
    currentDogLink: "",
    favoriteDogs: []
  };
},
2
3
4
5
6
To display the favorite dogs we should make changes to our template. Let's add the following code snippet right after the closing </v-card> tag
<v-container grid-list-md fluid>
	<v-layout wrap>
		<v-flex xs6 sm4 md2>
			<v-card class="dog-card">
				<v-img height="150px"></v-img>
				<v-card-actions>
					<v-spacer></v-spacer>
					<v-btn icon>
						<v-icon>delete</v-icon>
					</v-btn>
				</v-card-actions>
			</v-card>
		</v-flex>
	</v-layout>
</v-container>
2
3
4
5
6
7
8
9
10
11
12
13
14
15
You can see an empty card with a 'Delete' button right after the current dog view. Now we need to find a way to show favoriteDogs items inside of these cards.
To render a list of items based on an array Vue has a v-for directive, which will iterate through this array and render each item. Let's add this directive to our opening v-flex element that will show the array of favorite cards in the new container you just added:
<v-flex xs6 sm4 md2 v-for="(pet, index) in favoriteDogs" :key="pet"></v-flex>
Here pet is the reference to the current array element and index is the index of this element inside the array.
💡
Remember, we chose this name inside the directive; if we had written v-for="(dog, number) in favoriteDogs" each item would be called dog and its index would be called number).
To properly loop over your array of favorite dogs and append another one, you need to provide a unique key attribute for each item. In our case, the pet itself will be the key.
You can see that our empty card disappeared. It's fine! We have an empty favoriteDogs array so there's simply nothing to render right now.
One thing left to do is to bind pet (which will be the image link) to the src property of the v-img component in the cards you're building:
<v-img height="150px" :src="pet"></v-img>
Now it's time to like some dogs 💖🐶!
☕️ Take a break! ☕️
Now's a great time to join a breakout room if you're joining us on Zoom!
Adding Dogs to Favorites
We will create a new method called addToFavorites. It will add the value of currentDogLink to the favoriteDogs array (JavaScript has a push array method for this purpose). Let's place it after the loadNewDog one (don't miss the comma!)
addToFavorites() {
  this.favoriteDogs.push(this.currentDogLink);
}
2
3
And of course we need to bind it to the 'Like' button in the top card:
<v-btn icon @click="addToFavorites">
	<v-icon>favorite</v-icon>
</v-btn>
2
3
Now try to click on the 'favorite' button! You can see how our gallery is filling with the dogs' images 🖼️
There is one issue: now we can add one image a few times. To prevent this we should check if the currentDogLink is already inside the favoriteDogs array and if it's is, we will disable the 'favorite' button. Instead of placing this complex logic inside the template, we will create a computed property.
💡
Computed properties can be used to do quick calculations of properties that are displayed in the view. These calculations will be cached and will only update when their dependencies are changed.
Let's add computed right after the created() hook (don't forget the comma after the close of created()) and create a property named isAlreadyInFavorites in it.
  computed: {
    isAlreadyInFavorites() {}
  }
2
3
Any computed property should be a function returning the result of calculations. Let's check the index of currentDogLink inside the favoriteDogs array. If it is greater than -1 (in other words if the array contains such an element), the function will return true, otherwise it will return false:
computed: {
	isAlreadyInFavorites() {
	  return this.favoriteDogs.indexOf(this.currentDogLink) > -1;
	}
}
2
3
4
5
Now we can add a dynamic disabled attribute to the 'Like' button in the top card and set it equal to isAlreadyInFavorites.
<v-btn icon @click="addToFavorites" :disabled="isAlreadyInFavorites">
	<v-icon>favorite</v-icon>
</v-btn>
2
3
Try to add the dog to favorites. Now you can see that the 'favorite' icon is greyed-out and you cannot click it again.
Removing Dogs from Favorites
What if you stopped liking one of the dogs' images? In this unlikely event, you will need a way to remove it from the favoriteDogs array. We need one more method for this, so let's add it after the addToFavorites (add a comma after addToFavorites closing bracket):
removeFromFavorites() {}
Of course we should specify somehow what dog we want to remove from the array. Fortunately, we have the index parameter. Let's pass it to our method and remove the element with the given index from the favoriteDogs array:
removeFromFavorites(index) {
  this.favoriteDogs.splice(index, 1);
}
2
3
💡
Here the splice() method changes the contents of an array by removing existing elements. The first argument is the index of the element we want to start with and the second argument is the number of elements we want to remove.
Now we have to bind this new method to the 'Delete' button with a click handler:
<v-btn icon @click="removeFromFavorites(index)">
	<v-icon>delete</v-icon>
</v-btn>
2
3
💡
Don't forget to pass index to the removeFromFavorites method! When we don't pass any parameters, we can simply skip the brackets as we did for the addToFavorites method.
Try to add and remove some dogs from favorites. IT WORKS!
🎊Congratulations, you've finished the base project!🎊
Push your work to a repository on your GitHub account
Step 1: In CodeSandbox, click the Github icon in the sidebar, and grant permissions if necessary.
Step 2: Enter a name for your repository.
Step 3: Click create repository.
Supplement 1: Creating a Dog Component
At this point we want to abstract a single dog card from the Favorites grid into a separate component to learn how parent and child components communicate.
We have a components folder but for now it's empty. Let's create a new file here and name it Dog.vue.
Open this file and add <template></template> and <script></script> tags. Now our file looks this way:
<template> </template>

<script></script>
2
3
Now copy the whole v-card component that contains the favorite dogs (it's near the bottom, and has the css class dog-card) from App.vue and paste it inside the template tag. You can delete it from App.vue.
We now need a way to pass the dog image we want to view from the parent to the child. To do so, Vue uses props.
💡
Props are custom attributes you can register on a component. When a value is passed to a prop attribute, it becomes a _prop_erty on that component instance. In our case the Dog component will have a dog property, passed from its parent App component.
Let's add a props option to our Dog.vue component. First, we need to create an export statement inside our script tag (so later we will be able to import our Dog component inside the App one). Add this code block to Dog.vue:
<script>export default {}</script>
Now we can add a props option to this object and a prop dog:
<script>
  export default {
    props: {
      dog: {
        type: String
      }
    }
  };
</script>
2
3
4
5
6
7
8
9
Here we are also specifying the type of our dog - it will be a string containing the dog image URL.
In our template in Dog.vue we should replace pet with dog, because we don't have any pets inside the Dog component, only a passed dog property. Now our template should look like this:
<template>
	<v-card class="dog-card">
		<v-img height="150px" :src="dog"></v-img>
		<v-card-actions>
			<v-spacer></v-spacer>
			<v-btn icon @click="removeFromFavorites(index)">
				<v-icon>delete</v-icon>
			</v-btn>
		</v-card-actions>
	</v-card>
</template>
2
3
4
5
6
7
8
9
10
11
Now let's move back to our App.vue component and make some changes. First of all we should import our newly created Dog component into App.vue. Add this string before the export default statement in the <script> block:
import Dog from './components/Dog';
Now we have to 'explain' to the App component that it has a child component inside it. Vue uses a components option for this. Let's add a component option above the data() one:
export default {
  components: {
    appDog: Dog
  },
  data() {
    return {
      currentDogLink: "",
      favoriteDogs: []
    };
  },
2
3
4
5
6
7
8
9
10
💡
For each property in the components object, the key will be the name of the custom element, while the value will contain the options object for the component
💡
For the component name you can either use a camel-case (appDog) or kebab-case ('app-dog'). Keep in mind that a camel-case name will be 'translated' to kebab-case in HTML tag names. So we will use the HTML custom tag <app-dog> and it will render a Dog component
In App.vue, place the custom tag in the space where you deleted the card earlier, overwriting the <v-flex> tag:
<v-flex xs6 sm4 md2 v-for="(pet, index) in favoriteDogs" :key="pet">
	<app-dog></app-dog>
</v-flex>
2
3
We have to pass a dog prop to our Dog component. It will be done with the familiar v-bind directive (remember, you can use its : shortcut). Edit the code you just added to App.vue:
<v-flex xs6 sm4 md2 v-for="(pet, index) in favoriteDogs" :key="pet">
	<app-dog :dog="pet" @remove="removeFromFavorites(index)"></app-dog>
</v-flex>
2
3
Now if you try to add a dog to Favorites you will see the dogs in the grid again! But we have one issue: deleting a dog will cause a bunch of errors in console. The reason is we don't have a removeFromFavorites method inside the Dog.vue and it knows nothing about index as well.
Instead of using the method, we will replace it with an event emitter to the delete button inside the Dog component.
<v-btn icon @click="$emit('remove')"></v-btn>
By using $emit, we are sending a message to our parent component (in this case it's App.vue): 'Hi, something is happening here! Please read this message and react to it'.
Now when the Dog component emits the remove event (i.e. on 'Delete' button click), its parent App component will call removeFromFavorites method (which removes a certain dog from its favorites array).
🎊You've finished Supplement 1!🎊
Supplement 2: Add Animations
Now let's make our application more appealing by adding some animation effects to it.
💡
Vue provides a transition wrapper component, allowing you to add entering/leaving transitions for any element or component in the following contexts:
- Conditional rendering (using
v-if) - Conditional display (using
v-show) - Dynamic components
- Component root nodes
Let's try to animate the image of the current dog. First, we need to add a v-if directive to it to provide the proper context for the future transition. In App.vue, edit the main dog's card:
<v-img v-if="currentDogLink" height="400px" :src="currentDogLink"></v-img>
But now currentDogLink will always return true! Let's set it to the empty string every time we're clicking the 'Next' button, so before the next image is loaded, currentDogLink will return false:
loadNewDog() {
  this.currentDogLink = "";
  axios.get("https://dog.ceo/api/breeds/image/random").then(response => {
    this.currentDogLink = response.data.message;
  });
},
2
3
4
5
6
Now you can observe this ugly effect: the image disappears every time the user clicks 'Next'. We will fix it with the fade animation effect. Let's wrap the v-img in a <transition> tag and provide it with a name attribute fade.
<transition name="fade">
	<v-img v-if="currentDogLink" height="400px" :src="currentDogLink"></v-img>
</transition>
2
3
This will give us a bunch of CSS classes starting from fade-. There will be enter/leave which is the position that the animation starts with on the first frame, enter-active/leave-active while the animation is running - this is the one you’d place the animation properties themselves on, and enter-to/leave-to, which specifies where the element should be on the last frame.
Now that we have our hooks, we can create the transition using them. Edit the CSS in App.vue by adding the following classes:
.fade-enter-active,
.fade-leave-active {
	transition: opacity 1s ease;
}
.fade-enter,
.fade-leave-to {
	opacity: 0;
}
2
3
4
5
6
7
8
The .fade-enter-active and .fade-leave-active classes will be where we apply the actual transition. This isn't anything Vue-specific - just normal CSS. The ease property specifies a transition effect with a slow start, then fast, then ending slowly.
Now you can see that the dog picture has a nice fade effect when you click 'next'!
Let's also add some effects to our favorite dogs grid. To animate the list rendered with v-for, Vue uses the transition-group tag.
💡
Unlike <transition>, transition-group renders an actual element: a <span> by default. You can change the element that’s rendered with the tag attribute.
Elements inside are always required to have a unique key attribute
In App.vue, replace the <v-layout> component surrounding the <app-dog> nested component with v-transition-group and provide it with a proper tag attribute and class:
<transition-group name="slide" tag="v-layout" class="wrap">
	<v-flex xs6 sm4 md2 v-for="(pet, index) in favoriteDogs" :key="pet">
		<app-dog :dog="pet" @remove="removeFromFavorites(index)"></app-dog>
	</v-flex>
</transition-group>
2
3
4
5
transition-group will render as a v-layout component now. The class wrap is needed to wrap grid elements to the next row (it replaces the wrap attribute of v-layout). We also gave our new transition a name slide.
Now we can use CSS classes to describe the slide transition - add these classes to the CSS in App.vue:
.slide-enter-active {
	transition: all 0.3s ease;
}
.slide-enter,
.slide-leave-to {
	transform: translateX(10px);
	opacity: 0;
}
2
3
4
5
6
7
8
Great! We have a nice animation when we add a new dog to the grid. But there are no effects on delete. There is a -move class, which is added when items are changing positions. Like the other classes, its prefix will match the value of a provided name attribute (slide in our case). So we need to add some more styles:
.slide-leave-active {
	position: absolute;
}

.slide-move {
	transition: transform 0.5s;
}
2
3
4
5
6
7
💡
Notice the position: absolute on items that are leaving! It's done to remove them from the natural flow, triggering the move transition on the rest of the items.
Now our list has a nice move animation after deleting its element!
🎊You've finished Supplement 2!🎊
Author
Made with ❤️ by Natalia Tepluhina, updated by Jen Looper